All-Handmade Chocolate Nut Cookies
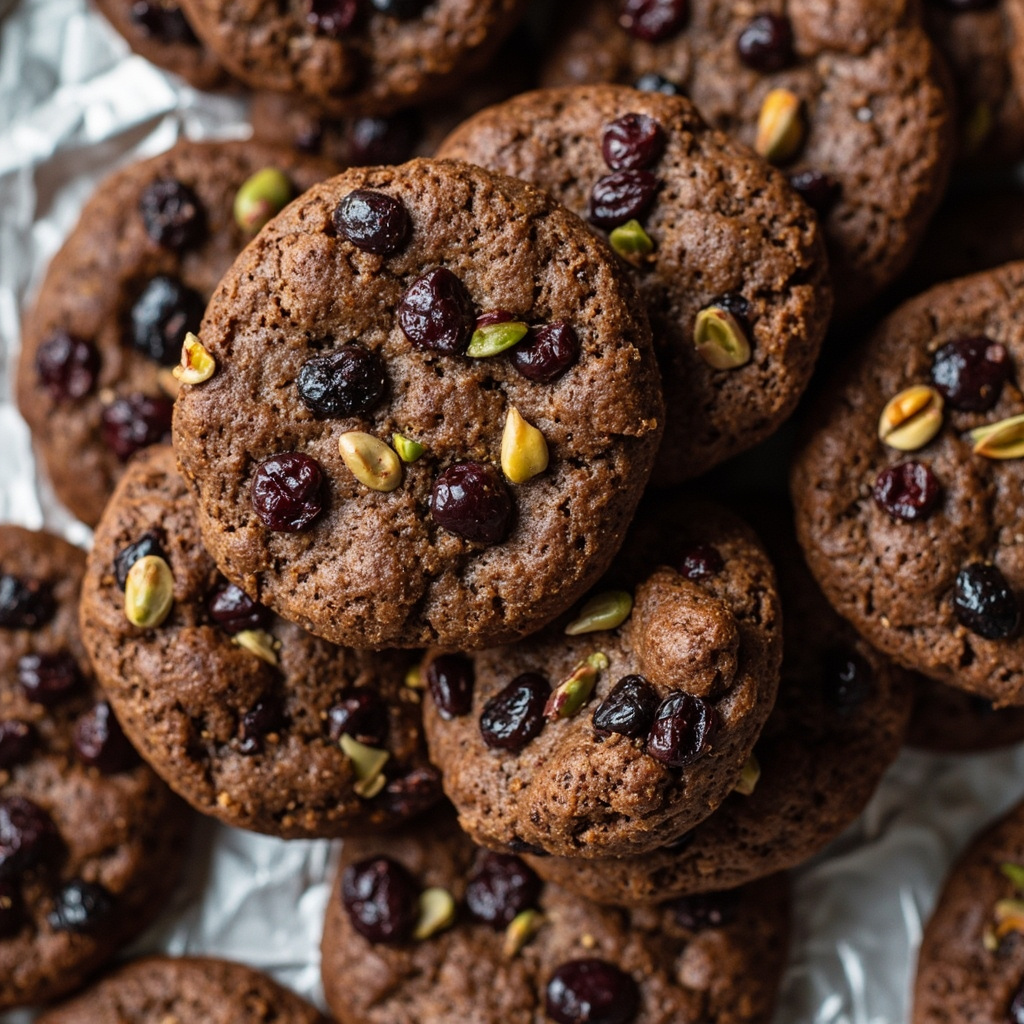
This cookie isn’t overly sweet, so it’s recommended not to reduce the amount of sugar or oil any further—less oil will make the cookies turn out dry. You can adjust the type of nuts to your own liking. Nuts must be crushed finely so they mix more evenly with the dry ingredients. You can also add baking-stable chocolate in place of blackcurrant raisins.
Story
These all-handmade chocolate nut cookies have a mild, not overly sweet flavor profile. It’s best not to cut back on the sugar or oil called for in the recipe, as reducing the oil will leave the cookies dry and crumbly. You can customize the nuts to match your personal preferences, just be sure to crush them finely so they blend seamlessly with the dry flour mixture. For a different twist, you can also swap the blackcurrant raisins for heat-stable baking chocolate that holds up well in the oven.
Ingredients
low-gluten flour
90g
cocoa powder
10g
pumpkin seed kernels
30g
pistachio kernels
30g
blackcurrant raisins
50g
cinnamon powder
2g
white sugar
20g
brown sugar
30g
chicken egg
1 piece
vegetable oil
40ml
baking soda
2g
salt
1g
rum
50ml
crushed chocolate
a pinch
Instructions
1
Step 1
Sift cake flour, cocoa powder, cinnamon powder, baking soda and salt together twice and set aside. Soak raisins in rum in advance until soft.
2
Step 2
Place pistachios and pumpkin seeds into a resealable plastic bag, crush them into coarse pieces with a rolling pin or the back of a knife.
3
Step 3
Take a large mixing bowl, crack the eggs and beat until uniform, add white sugar and brown sugar and stir to combine thoroughly, then add vegetable oil and beat until the mixture turns thick and viscous.
4
Step 4
Add the sifted dry ingredient mixture to the egg batter, fold gently until evenly combined, do not overmix. Then add the crushed nuts, soaked raisins, and a small amount of chopped chocolate, mix all ingredients thoroughly, and again avoid overmixing.
5
Step 5
Preheat the oven. Line a baking tray with aluminum foil, use a spoon to scoop a portion of batter onto the tray, and lightly shape it as desired. This free-form, irregular shape is perfect for beginners like me. Hahaha~ You can adjust the size and shape to your personal preference.
6
Step 6
Baking time varies depending on the size and power of your own oven; I baked mine for about 10 minutes. If you prefer crispier results, you can bake for a few more minutes.