
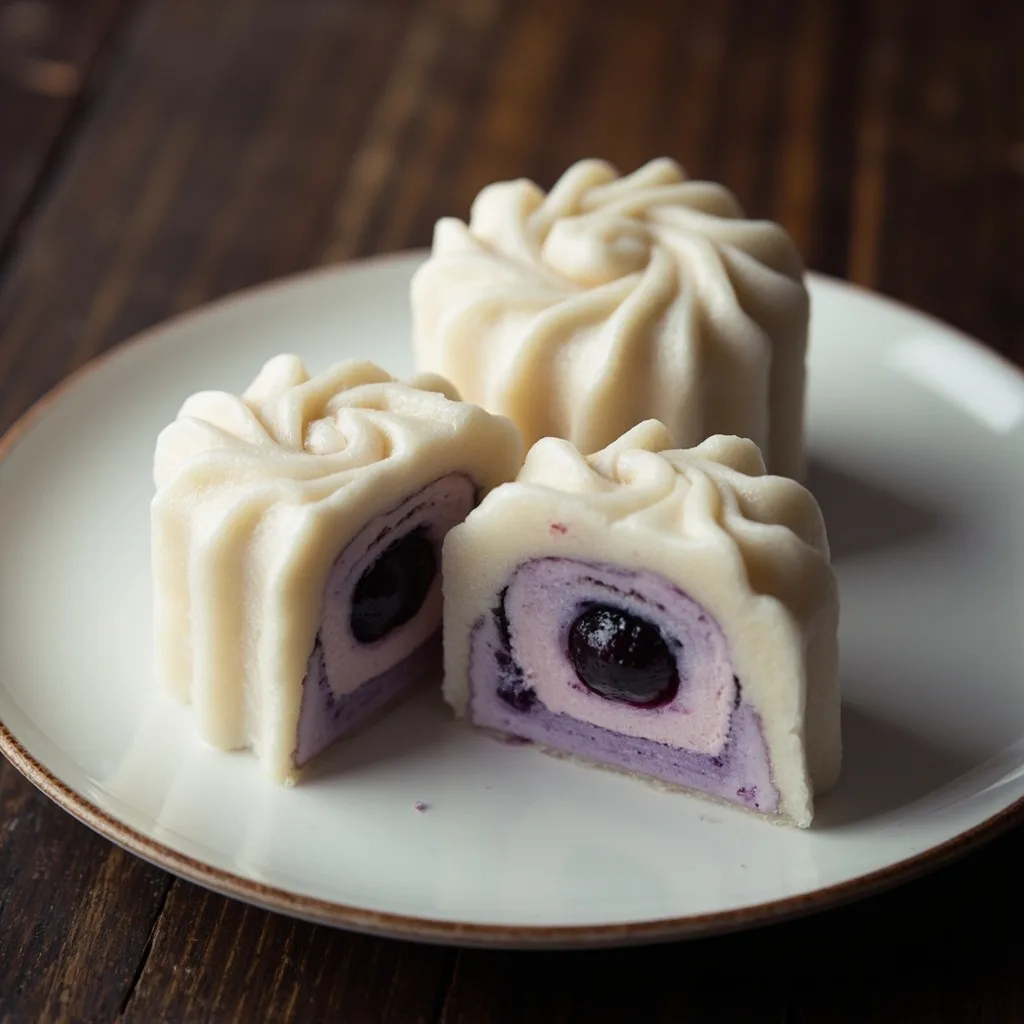
Blueberry Cheese Snow Skin Mooncakes😍 So Magical‼️
After making so many snow skin mooncake recipes, this batch’s appearance is absolutely stunning! It’s so ethereal and dreamy, I can barely bring myself to eat them. For this recipe, I used a 75g mooncake mold to make 65g snow skin mooncakes. Key final reminder! Once the snow skin mooncakes are assembled, be sure to freeze them—never store them in the refrigerator! Freezing keeps the skin soft and chewy even after long storage, while refrigerating will make the skin hard in just one day.
Ingredients
#Filling
Cream cheese
200 g
Fine granulated sugar
10 g
Homemade blueberry sauce
40 g
#Homemade Blueberry Sauce
Blueberries
250 g
Fine granulated sugar
100 g
Lemon
half
#Snow Skin Dough:
Milk
140 g
Corn oil
20 g
Glutinous rice flour
30 g
Rice flour
30 g
Wheat starch
20 g
Powdered sugar
20 g
Purple sweet potato powder
a pinch
#Others
Cooked flour
a pinch (toast glutinous rice flour over low heat until slightly yellow)
Instructions
1
Step 1
I made the blueberry sauce myself, but you can also use store-bought blueberry sauce. Homemade blueberry sauce is not too sweet. It can be prepared in advance.
2
Step 2
Add blueberries and fine granulated sugar to a pan and cook over low heat until slightly thickened, then add lemon juice and cook a bit longer. Total time is about 30 minutes. Let it cool completely, then transfer to a container and store in the freezer.
3
Step 3
Make the cheese filling (can be prepared in advance; the finished filling can be stored in the freezer): Add fine granulated sugar to cream cheese softened at room temperature, and press-mix until absorbed,
4
Step 4
Then add the blueberry sauce and fold until evenly combined.
5
Step 5
Transfer into a piping bag.
6
Step 6
Lay a small piece of plastic wrap on a digital scale, pipe 35g of cheese filling onto it, then gather the wrap and twist tightly. This should yield about 7 portions; place them in the freezer.
7
Step 8
Make the dough: Add corn oil to the milk and whisk with an egg whisk until emulsified.
8
Step 9
Add glutinous rice flour, rice flour, wheat starch, and powdered sugar, then continue stirring until evenly combined.
9
Step 10
Sift into a shallow plate, cover with plastic wrap, and poke a few small holes in the wrap with a toothpick. Steam over medium-high heat for 25 minutes once the steamer is producing steam.
10
Step 11
After steaming, use a spatula to gently fold it a bit. Once cooled to hand temperature, put on non-stick gloves and knead until the surface is smooth. It will feel wet and oily at first, but after kneading on a pastry mat for a while it becomes smooth.
11
Step 12
Take half of the dough, add a bit of purple sweet potato powder, and knead until evenly combined.
12
Step 14
Divide each of the two colored doughs into 15g portions; no need to roll into balls.
13
Step 15
Take one piece of each colored dough,
14
Step 16
Stack them crosswise into one piece,
15
Step 18
Flatten and spread out, then wrap around the cheese filling. Pinch the seam closed tightly and roll into a ball.
16
Step 19
This recipe yields a bit more dough than needed. If 30g of dough feels too thin and difficult to wrap, you can increase the weight per portion.
17
Step 20
Once all the dough portions are processed, coat the surface with a bit of cooked flour, place into a mold, press out a floral pattern, and gently demold.
18
Step 21
For the finished snow skin mooncakes, pack them into sealed bags and store in the freezer, or place them in an airtight container in the freezer. Before eating next time, take them out and let them come to room temperature for a while—once the skin softens, they're ready to eat.