Scalded-Dough Chive Boxes
I've been baking for years - Western breads, cakes, and cookies, as well as Chinese steamed buns, baozi, and flower rolls - but had never tried chive boxes until now. This time I finally made them using the scalded-dough method. There are several ways to prepare chive boxes: yeasted dough, scalded dough, and even a batter version a friend of mine uses. The scalded-dough method, as the name suggests, involves pouring boiling water over the flour, producing a softer wrapper with a pleasant springy bite. Even my mother, who has weak teeth, can eat them easily. The skin is less tough than cold-water dough and not as thick as yeasted dough. They aren't difficult to make either - this was my first attempt, and aside from a few clumsy folds, there were no real problems; it just takes practice. A little rough around the edges doesn't matter when they're homemade and taste this good.
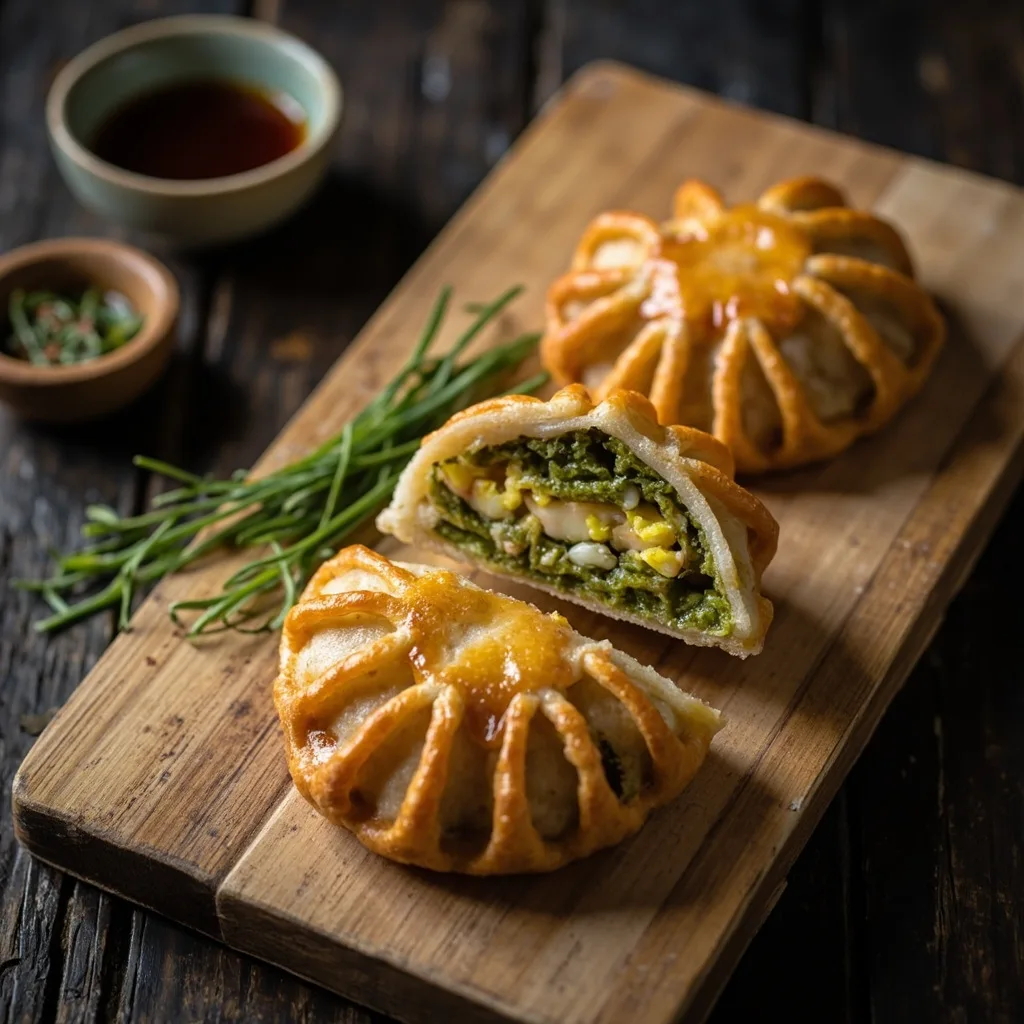
Ingredients
medium-gluten flour
250 g
boiling water
130 g
chives
100 g
eggs
2
shrimp paste
1 tbsp
Instructions
1
Make the dough
Pour the boiling water (after letting it cool for a few minutes) into the flour and stir with a spatula or chopsticks first. Once it is no longer too hot to touch, switch to kneading by hand. The dough is hard to work at first, so fold and press it repeatedly with your fist; it will gradually come together. If the dough feels very dry and stiff, wet your hand with a little cold water and knead it in, a tiny bit at a time. In the end, knead until you have a soft, non-sticky dough, about the texture of an earlobe. Cover and let rest for 30 minutes.
2
Beat the eggs
Crack 2 eggs into a bowl, add 1 g of salt and 5 g of water, and beat well. Scrambled eggs made this way come out tender.
3
Scramble the eggs into curds
Heat a small amount of oil in a non-stick pan over medium-low heat, pour in the egg mixture, and use chopsticks to constantly stir in small circles—this produces finely broken-up egg curds. If the heat is too high, the egg sets instantly and you will not get curds; in that case, you can simply chop the cooked egg finely with a knife.
4
Mix the filling
In a large bowl, place the scrambled eggs. Rinse the chives, drain them well, and finely chop (avoid the tough root ends). Add the chives to the bowl along with 2 g of salt, 1 tbsp shrimp paste, and 5 g of corn oil, then mix well. The shrimp paste is optional. I did not have dried shrimp at home, so I added a little of the paste for extra fragrance.
5
Divide the dough
Once the filling is ready and the dough has finished resting, divide the dough evenly into 6 portions. Remember to keep the portions covered—every time you pick up one piece, re-cover the rest.
6
Roll out the wrappers
Dust the work surface with a thin layer of dry flour to prevent sticking. Take one dough ball, flatten it, then roll it out with a rolling pin into a round—thicker in the center, thinner at the edges, just like a dumpling wrapper. Do not worry if the round is not perfectly even.
7
Add the filling
Place a generous amount of filling on one half of the wrapper, leaving about a 1 cm border around the edge.
8
Fold and seal
Fold the empty half of the wrapper over the filling and pinch the edges tightly to seal. See those uneven edges? It does not matter that the wrapper was not rolled perfectly round—just trim off the excess with scissors.
9
Crimp a decorative edge
After the edge is sealed, begin crimping a decorative pattern. I studied the techniques of several experts before trying this—it's also my first time making chive boxes.
10
Check the seal
Make sure the edges are pinched very tightly, otherwise the filling will leak out while pan-frying. Mine looks a bit rough—this takes practice.
11
Begin pan-frying
Heat a small amount of oil in a non-stick pan over medium-low heat, then place the chive boxes into the pan to start frying.
12
Fry both flat sides
When one side turns lightly golden, flip and fry the other side until both sides are golden. There is no need to cover the pan—everything except the chives is already cooked, and the chives cook very quickly.
13
Brown the standing edge
Once both flat sides are golden, use chopsticks to stand each chive box up on its edge and brown the seam as well—it tastes even better that way.