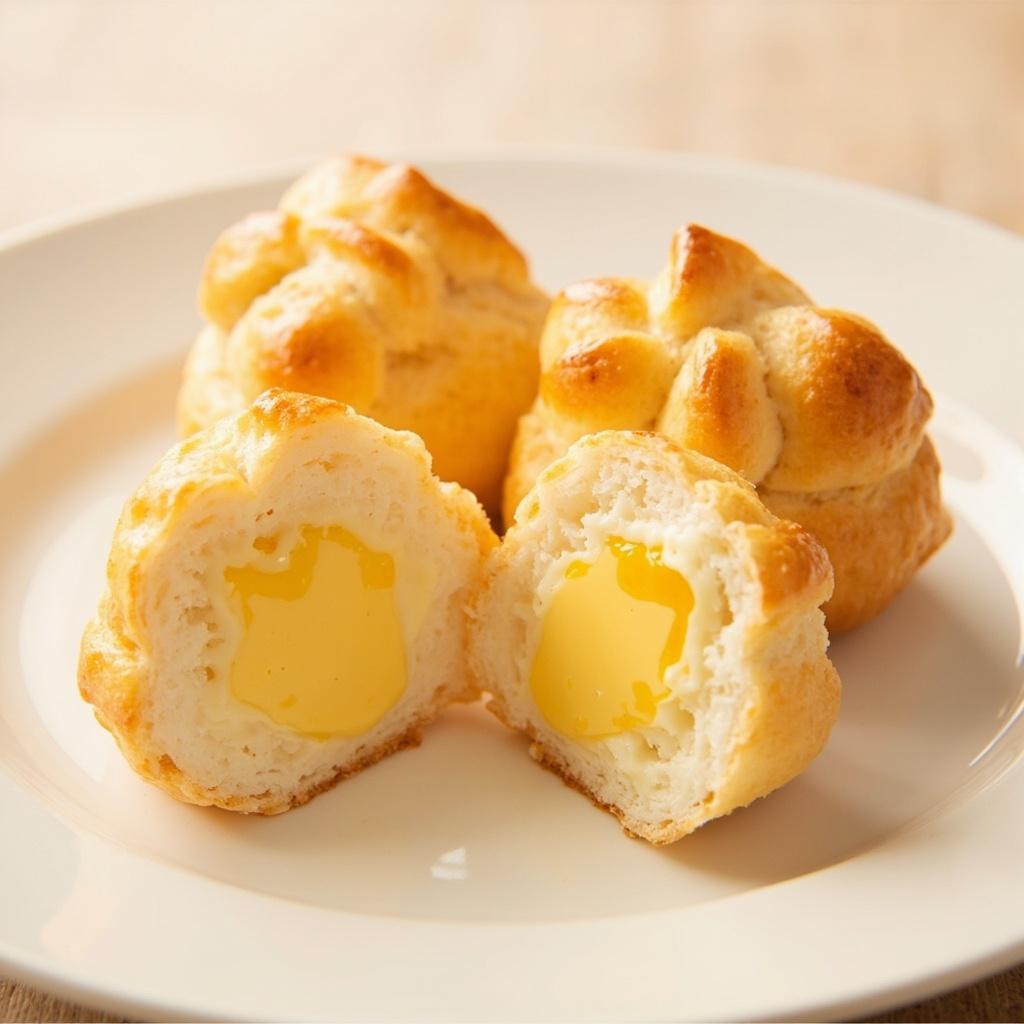
Vanilla Mini Cream Puffs
A homemade attempt at making mini cream puffs. Though they weren't quite as delicious as the famous 'Puff Papa' bakery ones, experimenting with fun piping shapes and discovering a new, ice-cream-like way to eat them frozen made for a delightful experience.
Story
This time I made mini cream puffs. I'm not sure if it was because of their size or my technique, but I felt they weren't as good as the ones from the store... especially that cookie-flavored one, which is super delicious! However, I always feel terribly guilty while eating them. When making the shells, I used a piping tip to squeeze out a few poop-shaped ones, and they really came out looking exactly like that, which cracked me up. I also want to share a newly discovered way to eat mini puffs that happened by accident. The other day, a friend brought over a box of store-bought puffs. They were still frozen solid because we couldn't wait for them to thaw, but they turned out to be unexpectedly delicious—just like eating ice cream! Absolutely amazing.
Ingredients
milk
100ml
white sugar
3tbsp
egg yolk
2 pieces
corn starch
1tbsp
cake flour
1tbsp
vanilla extract
1/2tbsp
heavy whipping cream
100ml
cream puff shell:
cake flour
100g (210ml)
water
160ml
unsalted butter
6 tbsp
white sugar
1 tsp
salt
1/2 tsp
eggs
3 pieces
Puff filling (Hokkaido chiffon filling):
Instructions
1
Step 1
For the puff filling: separate the egg yolks and egg whites.
2
Step 2
Beat the egg yolks until thick, pale in color, and increased in volume, for about four to five minutes.
3
Step 3
Add the dry ingredients and mix well into a batter.
4
Step 4
Boil the milk and white sugar, then turn off the heat. Add 1/3 of the batter from the previous step and mix well, then add another 1/3 and continue to mix well. Finally, pour the batter back into the milk saucepan, add vanilla extract, and mix well.
5
Step 5
Continue to heat over low heat until it boils, then turn off the heat, and place the milk saucepan into ice water.
6
Step 6
Stir continuously until it forms a smooth paste. Cover with plastic wrap and refrigerate.
7
Step 7
Whip the heavy cream just until it is stiff enough to hold patterns.
8
Step 8
Then mix evenly with the refrigerated vanilla paste. The puff filling is now ready; continue to refrigerate until ready to use.
9
Step 9
Cream puff shell: water + salt + sugar + butter,
10
Step 10
Heat over medium heat to melt the butter until boiling.
11
Step 11
Turn to low heat, pour in the cake flour all at once, quickly stir and mix until it no longer sticks to the pot, then turn off the heat,
12
Step 12
Let it cool slightly until it is warm and does not burn your hands.
13
Step 13
Add the egg liquid to the dough. It must be added in batches, adding four or five spoonfuls each time; stir evenly and wait for the dough to completely absorb the egg liquid before adding the next batch. Keep repeating this until you lift the wooden spoon and see the batter form an inverted triangle, then you can stop. 3 eggs may not be completely used up. (However, mine were all used up and it was still a bit dry, so I added a little bit of milk)
14
Step 14
Take the cream puff dough. There are two methods: if you don't mind the trouble, use a piping bag; for a simpler approach, use two spoons to portion out many small doughs, roughly shaping them into balls, keeping a certain amount of space for expansion. If the resulting dough has pointed corners and isn't round enough, you can dip a spoon in a little bit of water and press it down.
15
Step 15
Bake at 410F first for 15 minutes, then turn to 360F and bake for 25 minutes. You absolutely must not open the oven during the baking process; observe the browning from the outside, and when it is golden brown, it is about done.
16
Step 16
Take the baked puff shells out, let them cool for a while, then cut a slit, and use a piping nozzle to fill with the stuffing.