Colorful Fruit-Flavored Snow Skin Mooncakes
Mid-Autumn Festival is here once again. These days, the busiest people are those of us who love tinkering with food. Mooncakes are an essential part of the festival, appearing on every table whether people like them or not. This year is no exception—I'm still making my own mooncakes.
I especially love snow skin mooncakes. They are less oily and sweet than traditional mooncakes, easier to prepare, and more modern in style. This year I've added a twist: I used fruit to tint and flavor the snow skin. The result has pure natural colors and a subtle fruity taste—beautiful and delicious.
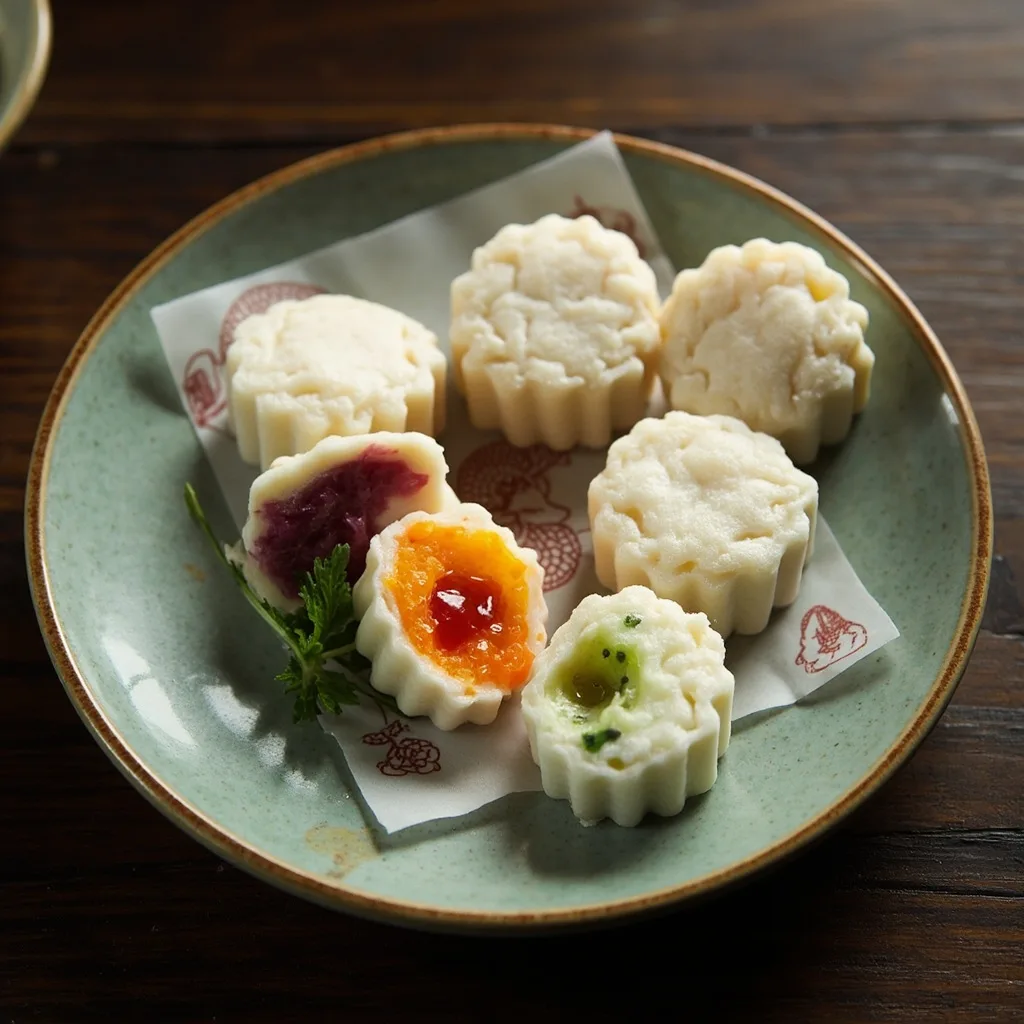
Ingredients
Snow skin mooncake flour
400g
Red beans
500g
Dragon fruit
100g
Kiwi
1
Carrot
100g
Sugar
150g
Vegetable oil
120g
Dusting flour
50g
Water
50g
Instructions
1
Step 1
Prepare all ingredients.
2
Step 2
Prepare the fruits for making the mooncake skin.
3
Step 3
Stir-fry 50g of glutinous rice until cooked to use as dusting flour.
4
Step 4
Make the red bean filling; cook the red beans until soft,
5
Step 5
Pour them along with the broth into a blender and blend into a paste; the finer, the better.
6
Step 6
Place the red bean paste in a wok, add oil and sugar, and stir-fry until the liquid evaporates,
7
Step 7
When it feels as soft as an earlobe when pinched, remove from heat and set aside.
8
Step 8
Wash the dragon fruit, kiwi, and carrot separately and cut into small pieces,
9
Step 9
Juice the kiwi in a blender,
10
Step 10
Juice the dragon fruit in a blender,
11
Step 11
Juice the carrot in a blender,
12
Step 12
These are the freshly juiced fruit juices and plain water; measure out 50g of each.
13
Step 13
Place 100g of snow skin mooncake flour in a large bowl. Heat each fruit juice separately in a stainless steel ladle until boiling, then pour the hot juice into the flour while stirring continuously,
14
Step 14
Then knead into a smooth dough. These are all four colors of the prepared snow skin dough,
15
Step 15
Roll both the red bean filling and the snow skin dough into small balls of about 25g each,
16
Step 16
Then take 5 different colored snow skin doughs, roll them into strips, form into balls, and divide each into 5 portions,
17
Step 17
Roll into small balls again, being careful not to over-mix so that the colors remain distinct,
18
Step 18
Take one dough ball, flatten it into a smooth wrapper, and place a filling ball in the center,
19
Step 19
Slowly wrap the filling, seal the opening tightly, roll until smooth, then dust with some dusting flour,
20
Step 20
Place into the mooncake mold, press the top flat while ensuring the mooncake makes full contact with the mold with no gaps. Flip it over and press the spring to release the mooncake.
21
Step 21
Repeat the process for the remaining mooncakes.